Static Website hosting on AWS S3 ~ Part II ~
Generate static website with HUGO, and deploy to robust AWS S3 with CI/CD pipeline by GitHub and Travis CI

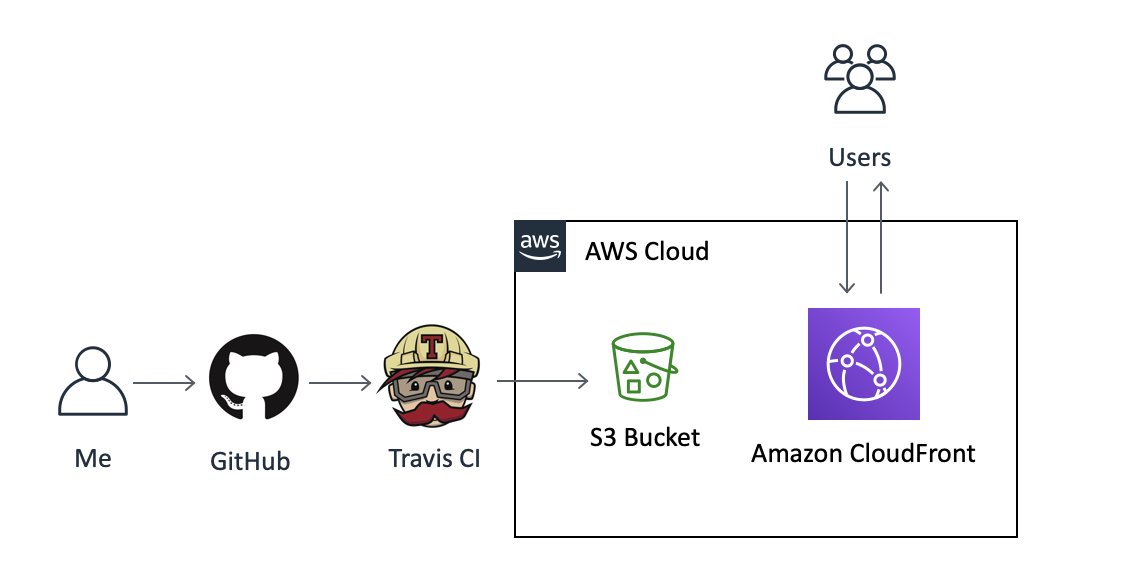
Hello Coder🤩! Welcome to my personal blog! This post will show you how to deploy HUGO static site from GitHub to AWS S3 automatically via TravisCI.
Create S3 Bucket
First of all, let’s make an S3 bucket to host static site, but before that, you need IAM account which has a managed permission to S3 because you have to need to deploy some files via TravisCI programmatically.

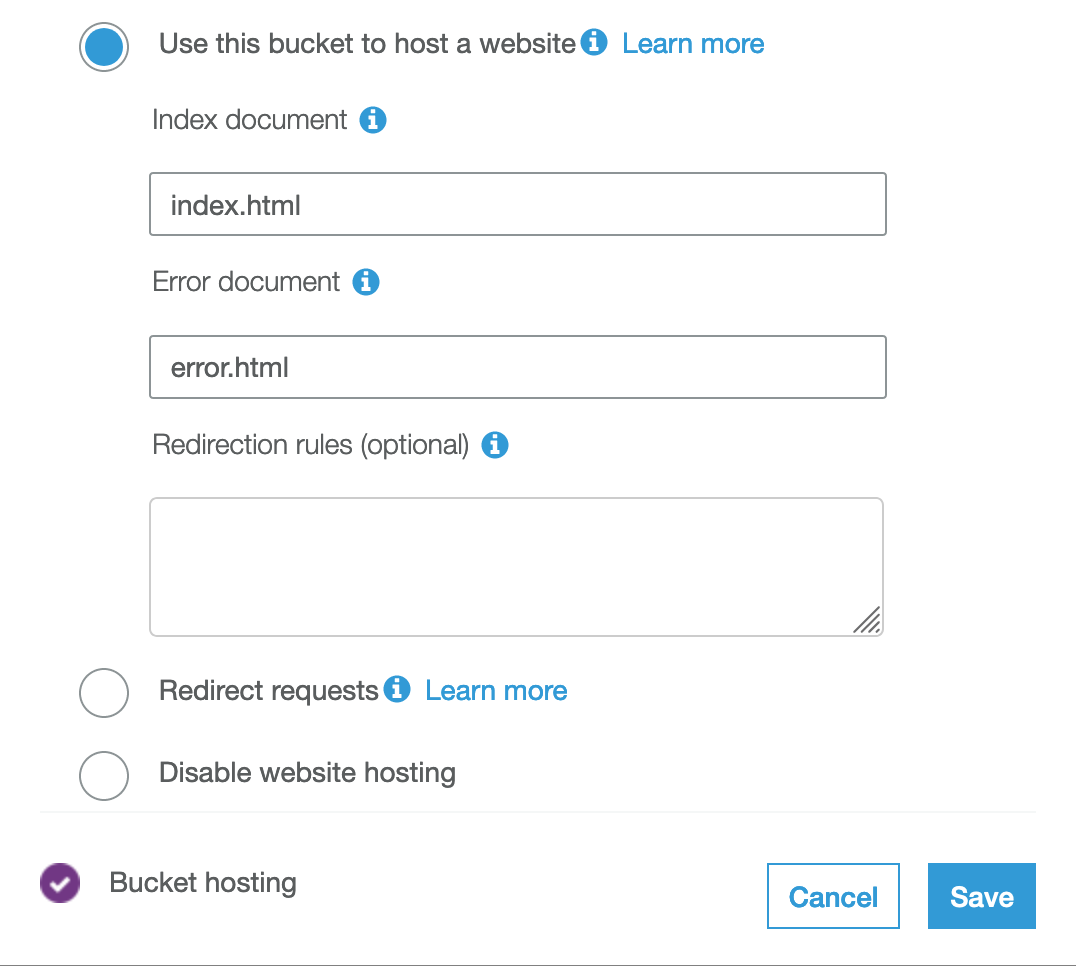
Static Website Hosting

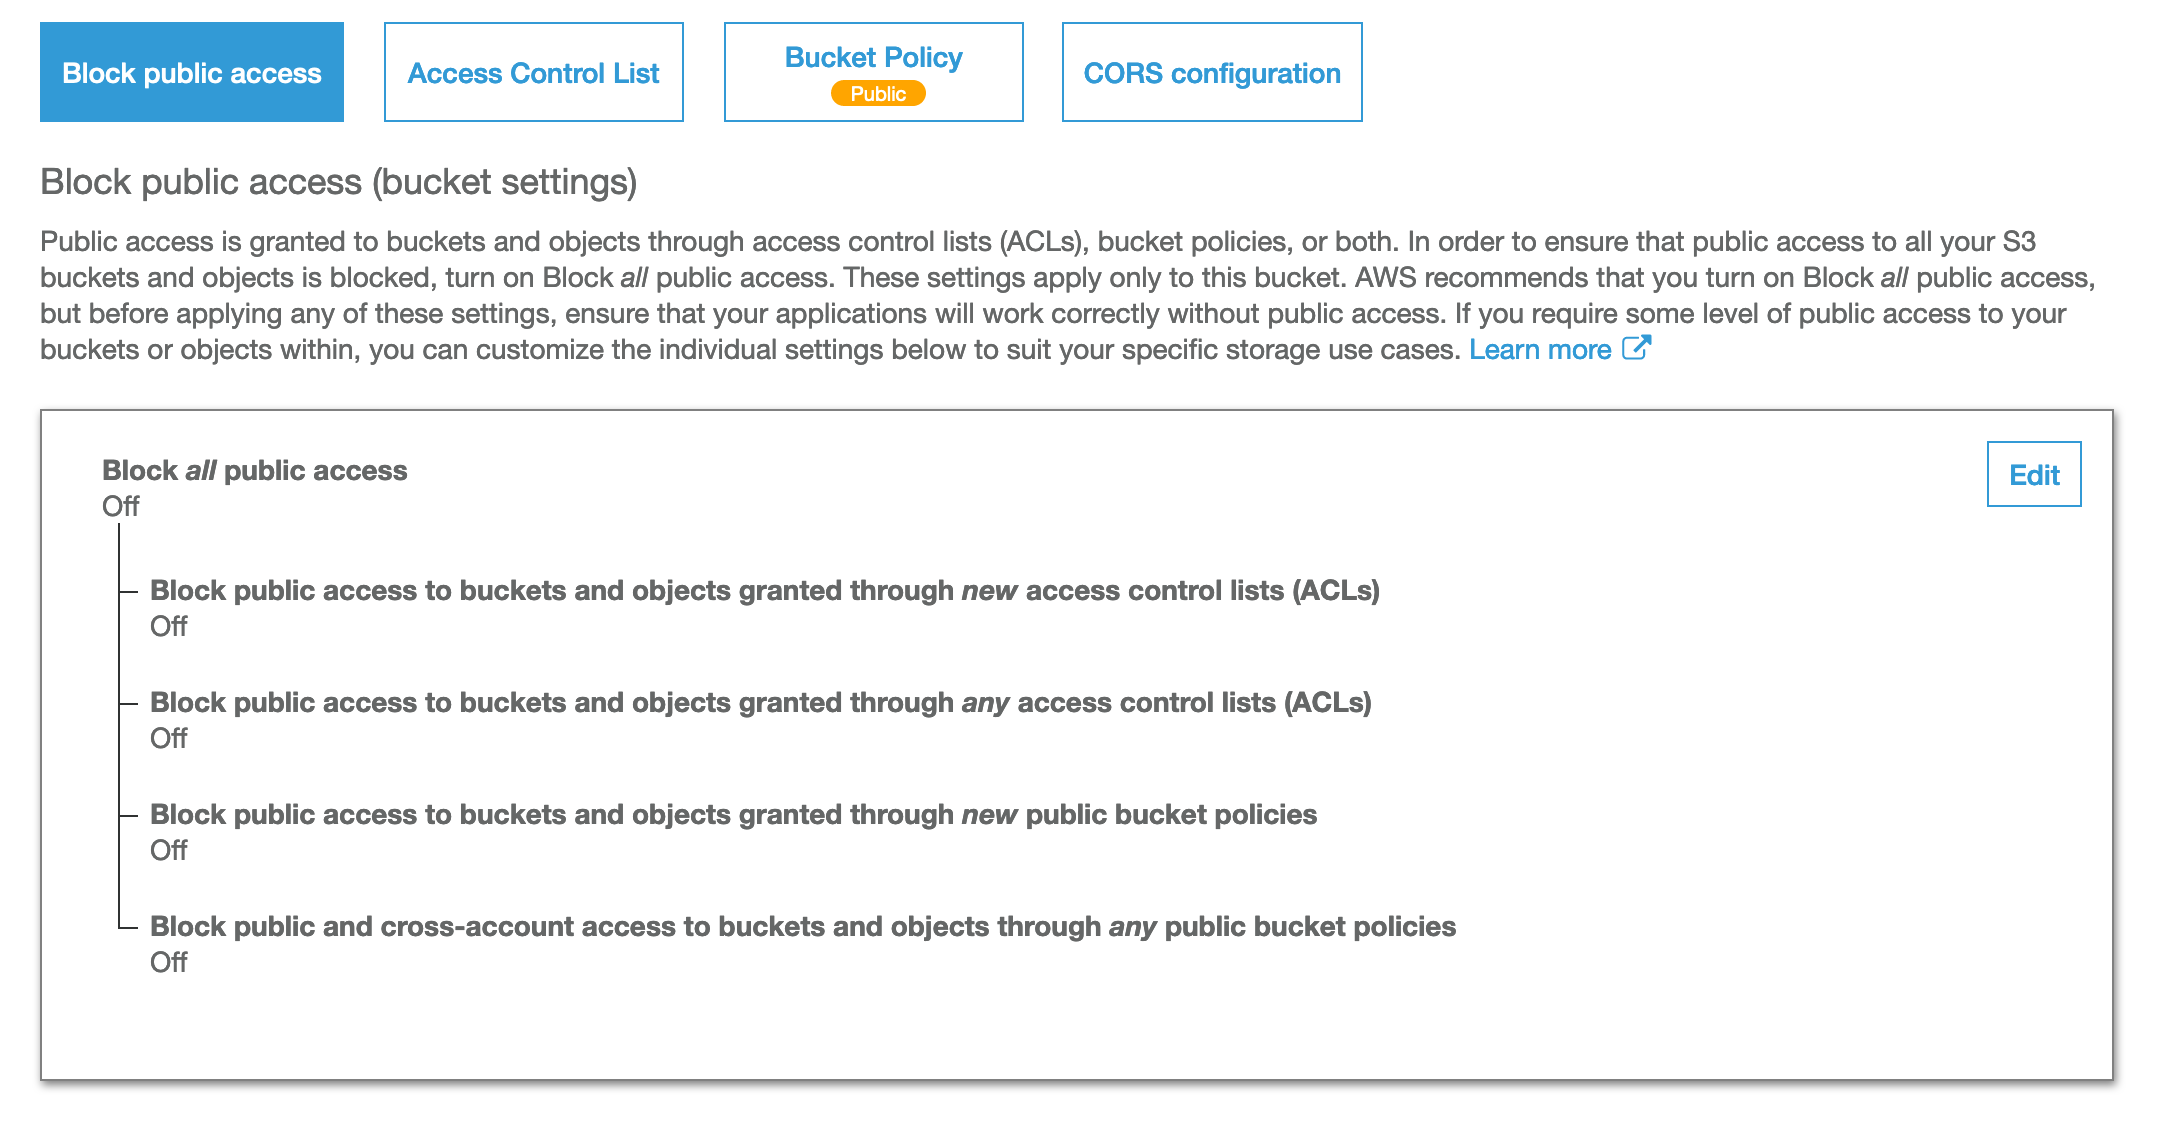
Public Access Control
After creating a S3 bucket allowed for public access, you need to attach some policy to the S3 bucket, because you are going to upload multiple file to S3 bucket programmatically.
{
    "Version": "2012-10-17",
    "Statement": [
        {
            "Sid": "AllowPrivateUpload",
            "Effect": "Allow",
            "Principal": {
                "AWS": "arn:aws:iam::[Your IAM User Number]:root"
            },
            "Action": [
                "s3:AbortMultipartUpload",
                "s3:DeleteObject",
                "s3:GetObject",
                "s3:GetObjectAcl",
                "s3:PutObject",
                "s3:PutObjectAcl"
            ],
            "Resource": "arn:aws:s3:::[Your Bucket's Name]/*"
        },
        {
            "Sid": "AllowPublicRead",
            "Effect": "Allow",
            "Principal": "*",
            "Action": "s3:GetObject",
            "Resource": "arn:aws:s3:::[Your Bucket's Name]/*"
        }
    ]
}
- NOTE :This policy is essential even if you made configure for static website hosting from GUI
if your AWS free trier has already been expired, and access I/O is unfrequent, it would be one of the best way to cut down your AWS cost to use S3 One Zone-Infrequent Access instaed of standard class
Now you are ready to make CI/CD pipline, but before that, you might as well check if S3 could host index.html as your expectation by uploading all file under public directory manually.
TravisCI & Github
Before moving on to Deploy, I highly recommend you to install Travis CLI.
# Install Travis CLI (NOTE: you have to install ruby also)
$ gem install travis -v 1.8.10 --no-rdoc --no-ri
When I use
traviscommand I had an error message like below`bin_path': can't find gem travis (>= 0.a) (Gem::GemNotFoundException) from /usr/local/bin/travis:22:in `<main>'But, it worked with sudo permission
Next, you need to describe a detail about your build process after pushing to master branch on GitHub.
$ touch .travis.yml
$ sudo travis setup s3
Finally, this is my .travis.yml
language: node_js
node_js:
- node
deploy:
  provider: s3
  access_key_id: [Access Key ID]
  bucket: [Your S3 bucket Name]
  skip_cleanup: true
  local-dir: public
  acl: public_read
  secret_access_key:
    secure: [Encrypted Secret Access Key]
  on:
    repo: [Your Github Repository Name]
Now you are ready for everything 🎉🎉🎉🎉 If you need your own domain name instead of a default S3 bucket URL, I highly recommend to use name.com, which is available for free if you are stil student. Actually Amazon Route53 is not included in AWS Free tier.

